In the Inovista Animator, images can be clipped and/or masked. A clip path
is an element where everything within the defined shape is visible, while
the outside portion is “clipped out” and doesn’t appear as a visible part of
the image. A mask defines a shape that will be painted onto the background
which completely or partially masks out parts of the image. A mask can also
be colored meaning that only certain parts of the image will be seen as a
different color. These features can be particularly useful in creating
visual graphics such as image type bar charts.
The amount of clipping and masking placed on an image and its direction is
defined via attribute options in the transition.
Select a whole image or an element within the image to be used as the
clip. Then select 'Clip Transition'. In addition to the usual 'Duration',
'Delay' and 'Easing' options, there will be a 'Clip' section.
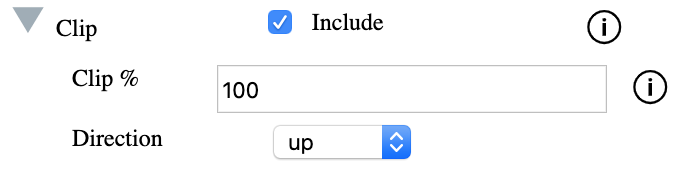
Select the 'Include' checkbox to run a clip transition.
Enter the percentage of the element to be clipped in the 'Clip %' field.
Do not enter a percentage sign. A Variable can also be used here so that
the amount of clipping can be defined at runtime.
Select the direction of the clip: 'up', 'down', 'left' or 'right'. The clip
will be drawn based on the the duration of the transition. To initialize
with the clip already drawn, set the duration to '0'.
Clip Section
The Mask Options
Select a whole image or an element within the image to be used as the
mask. Then select 'Mask Transition'. In addition to the usual 'Duration',
'Delay' and 'Easing' options, there will be a 'Mask' section.
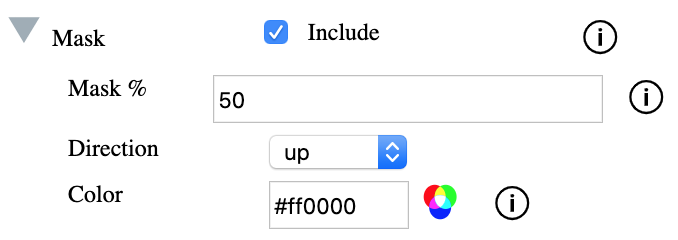
Select the 'Include' checkbox to run a mask transition.
Enter the percentage of the element to be masked in the 'Mask %' field. Do
not enter a percentage sign. A variable can also be used here so that the
size of the mask can be defined at runtime.
Select the direction of the mask: 'up', 'down', 'left' or 'right'. The mask
will be drawn based on the the duration of the transition. To initialize
with the mask already drawn, set the duration to '0'.
The color of the mask can be entered in hex format i.e. '#ff0000' or the
color popup utility can be used by clicking the icon at the end of the color
field. A variable can also be used for the mask color.
Mask Section
The images below all contain
working examples of some of the points just mentioned. Please note that each
image must have a different SVG ID to ensure that there is no confusion
about which effects apply to any given image.
Up Direction Clip
This example shows a ball image running a path motion in a background.
The ball follows a line with '0' opacity (invisible) and uses an
'expOut' easing to give the impression of a series of bounces that slow
down. The bounce path was drawn in an SVG editor and pasted into the
Animator.
In the Clip Transaction section of the Animator,the settings are as
follows:
Up Direction Mask
This example shows an oval element in the image following a spiral path
that has been defined within the image itself. The spiral path may be
visible or invisible.
In the Mask Transaction section of the Animator,the settings are as
follows:
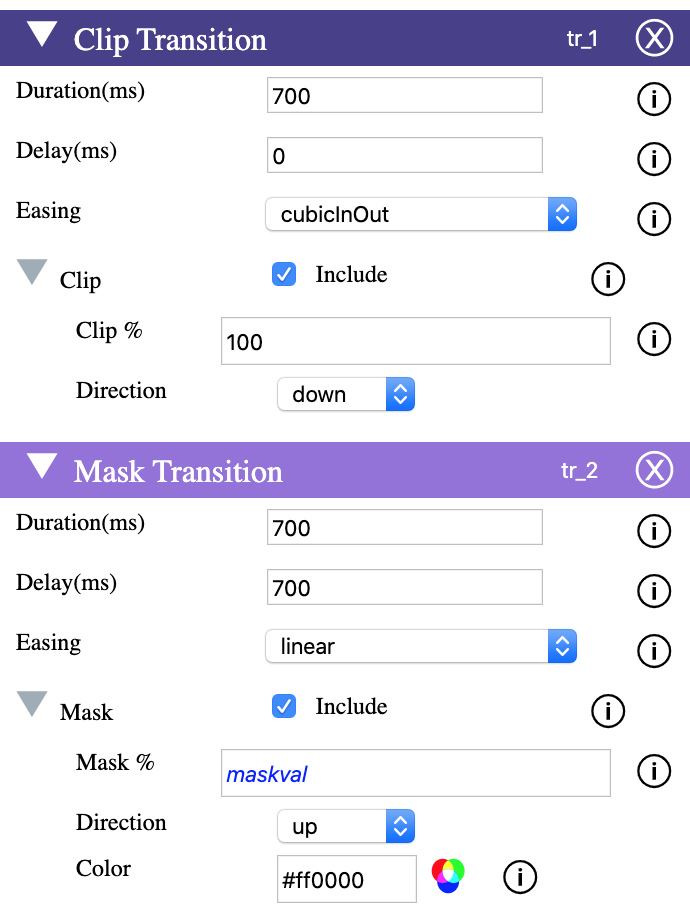
Combined Clip and Mask
This example works in exactly the same way as in the example immediately
above but uses a variable to change the path data values that define the
motion at runtime. Variables also change the x and y locations of the
transition end point.
In the Clip and Mask Transaction sections of the Animator,the settings
are as follows: