Inovista
    
Animator


Scaling Images

In the Inovista Animator, images can be scaled within their containing background and parts of that image can be scaled within the image and of course, both of these actions can be implemented to run simultaneously. Image transitions can also be chained, this means a sequence of transitions can be played one after another. A chained transition will be played the moment that the previous transition has completed. Note that using the 'delay' option can stall the start of the transition by the amount of time entered in the 'delay'.

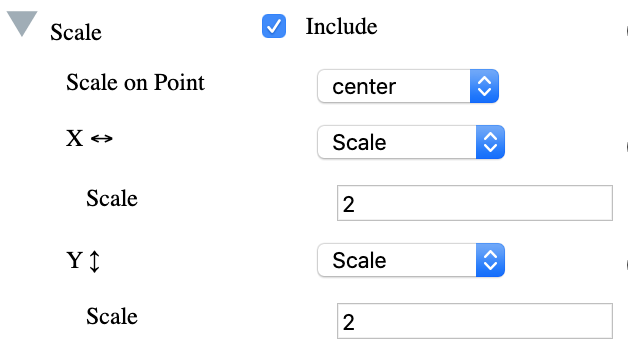
Scaling is most often undertaken using the 'center' point but using the 'Scale on Point' dropdown, other parts of the image can be used as the base point of the scale. The scale point will be valid for both the x and y axes.


scpt


See Working Examples.
Basic Scaling
Images can be scaled on both the x and y axes, either simultaneously or individually. Enter the required values for x and y in the relevant textfield. A value of '1' means the original size, a value of '2' means double the size and so on. A value of '0' means the image will be invisible. Use the easing dropdown to change the effect when running the scale.

scpt1

Scale to Pixel Size
Images can be scaled to a specific size in pixels on both the x and y axes. Enter the required values for x and y in the relevant textfield. The value entered in the textfield will be the new size of the image in pixels.
 
scpt1


On Image Editing
The element/node can be scaled on the displayed image. Click on the 'Display on Image to Edit' button to place an editable copy on the image. See On Image Editing for more information.

displayeditbutton


Using Variables
As with almost all options within the Inovista Animator, the ability to use variable values is available. Using variables allows the value to be changed at runtime using the Animator API. Note that most of the examples below are using variables to change how the animation works when various options or buttons are selected.
To define a variable, enter a text value into the relevant textfield, i.e. one of the 'Scale' fields.

mvvar

Once a variable has been created, that variable name should appear in the 'Variable Values' section at the bottom of the editor section of the Inovista Animator (left side). To run the image in the Animator, enter a value into the textfield next to the variable name. Note that this value will be the default when the image is exported. This value can be edited at runtime.

mvvarval

The images below all contain working examples of the points just mentioned. Please note that each image must have a different SVG ID to ensure that there is no confusion about which effects apply to any given image.
Basic Scaling


This example shows scaling on both the x and y axes. The animation duration is 1000 milliseconds(1 second) and a bounce out easing effect is added. This sample is using a variable value for both the x and y scale.

In the Scale section of the Animator, scale values are setup as shown below:

Scale to Pixel Size

This example shows scaling to a size in pixels on both the x and y axes. The animation duration is 1000 milliseconds(1 second) and a bounce out easing effect is added. This sample is using a variable value for both the x and y scale.

In the scale section of the Animator, scale to a pixel size settings are setup as shown below:

Scale on Point

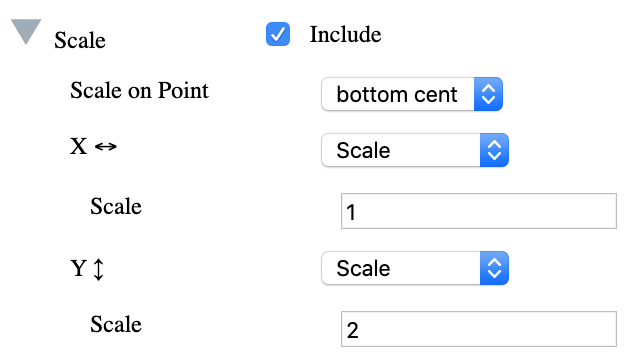
This example shows a chained transition of scales with the scale point based on 'Bottom Center'. The first transition scales the y scale to '0.1' and then it is scaled to '2'.

In the movement section of the Animator, select 'bottom center' in the 'Scale on Point' dropdown and enter values as shown below: